
I've done some more to my Rhino, mainly highlights and some detailing. I'm hoping to add transfers and start the weathering process soon. I want to add lots of paint 'scratches' and other scuff details. I'm also thinking about bullet dents and other battle damage, but I don't want to mess up my nice paint job too much! It's been a long while since I've painted a tank and I've enjoyed painting the smooth finish it has now.

The camera flash shows it as being a lot lighter than it actually is. In reality, the blue basecoat is quite dark.
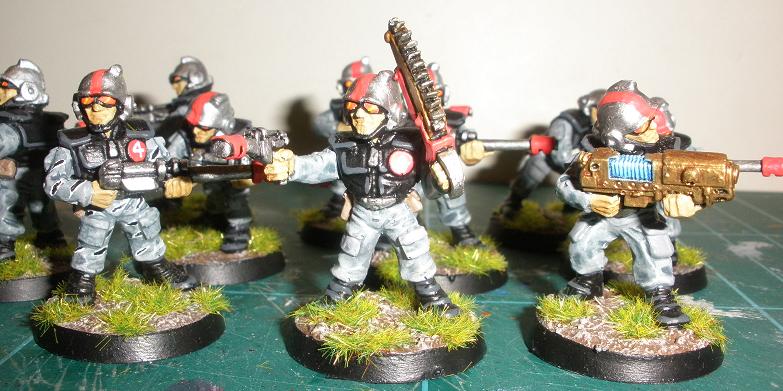
Also, I've finally completed my ten man Imperial Army tactical unit! Here they are in all their retro glory:

We have a Sergeant in the centre and a plasma gunner to the right. If you look closely, the trooper on the left has a camo pattern on his uniform. I wanted all of them to have this (rather than plain grey), but it took so long to do it on one model, I decided to get them finished first and think about adding camo patterns later!
Finally, there's the beginnings of a force of 'other' troopers. These are painted distinctly different than the army troops, and they are intended to be used as 'opposing' forces'. By that I mean any other enemies that the Imperials might face. Examples could include; Cult Guards, renegade or rebel troops, a planetary governor's private troops, a noble's household guard, etc. So hopefully they might turn up in many scenarios. They are also armed differently than the army troops, having autoguns rather than lasguns.

That's all for now, more to come.
I have two Crimson Fist Rhinos in the loft I painted in 1989, next time i go up there I will take some snaps you will have a good laugh, i think there are more Rhino marines on the outside that you could fit inside, I painted both Crimson fist colour schemes deatiled on the reference sheets provided in the kit. loving these posts keep it up.
ReplyDeleteJ
Take a photograph in an area of natural light, like outside on a sunny day, with no flash. Then edit the picture here; http://pixlr.com/editor/ Go to Adjustment; Levels and you'll see the Red, Green and Blue levels. Move the markers so that you remove the parts of the graph where the lines are 'flat'.
ReplyDeleteGood work, always like your line highlighting style.